Setting up timestamp services in Adobe
Adobe Acrobat (Pro or Reader).
An internet connection for communication with the timestamp server.
Timestamp server URL
Baltstamp
Sectigo
Baltstamp and Sectigo are just two examples of providers that offer this service free of charge. For additional providers, you can conduct online research.
For the terms of use, please contact the respective providers.
Configuration in Adobe Acrobat
1. Start Adobe Acrobat: Open Adobe Acrobat on your computer.
2. Access the settings:
- Go to Menu > Preferences > Signatures.
- Navigate to the Timestamp section.
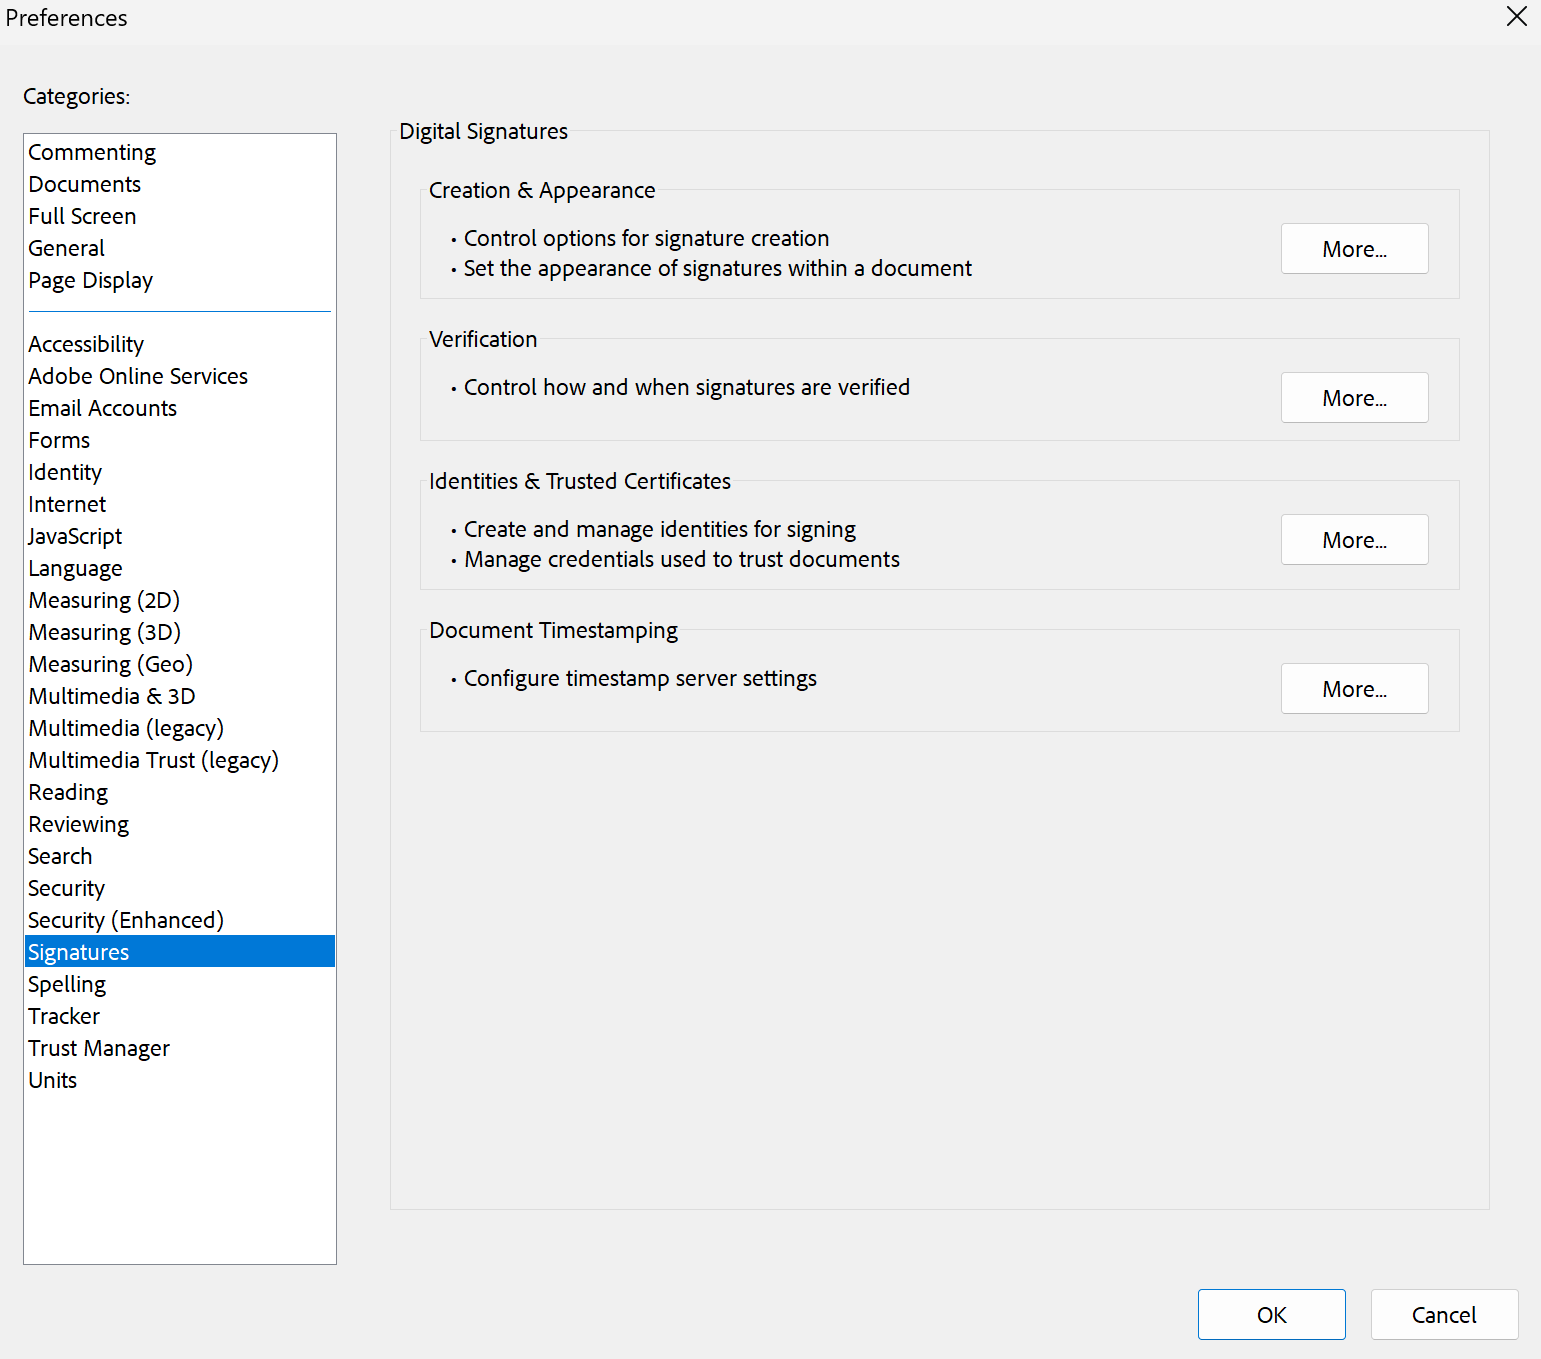
3. Configure the timestamp:- Click on Time Stamp Servers.
- Click on New.
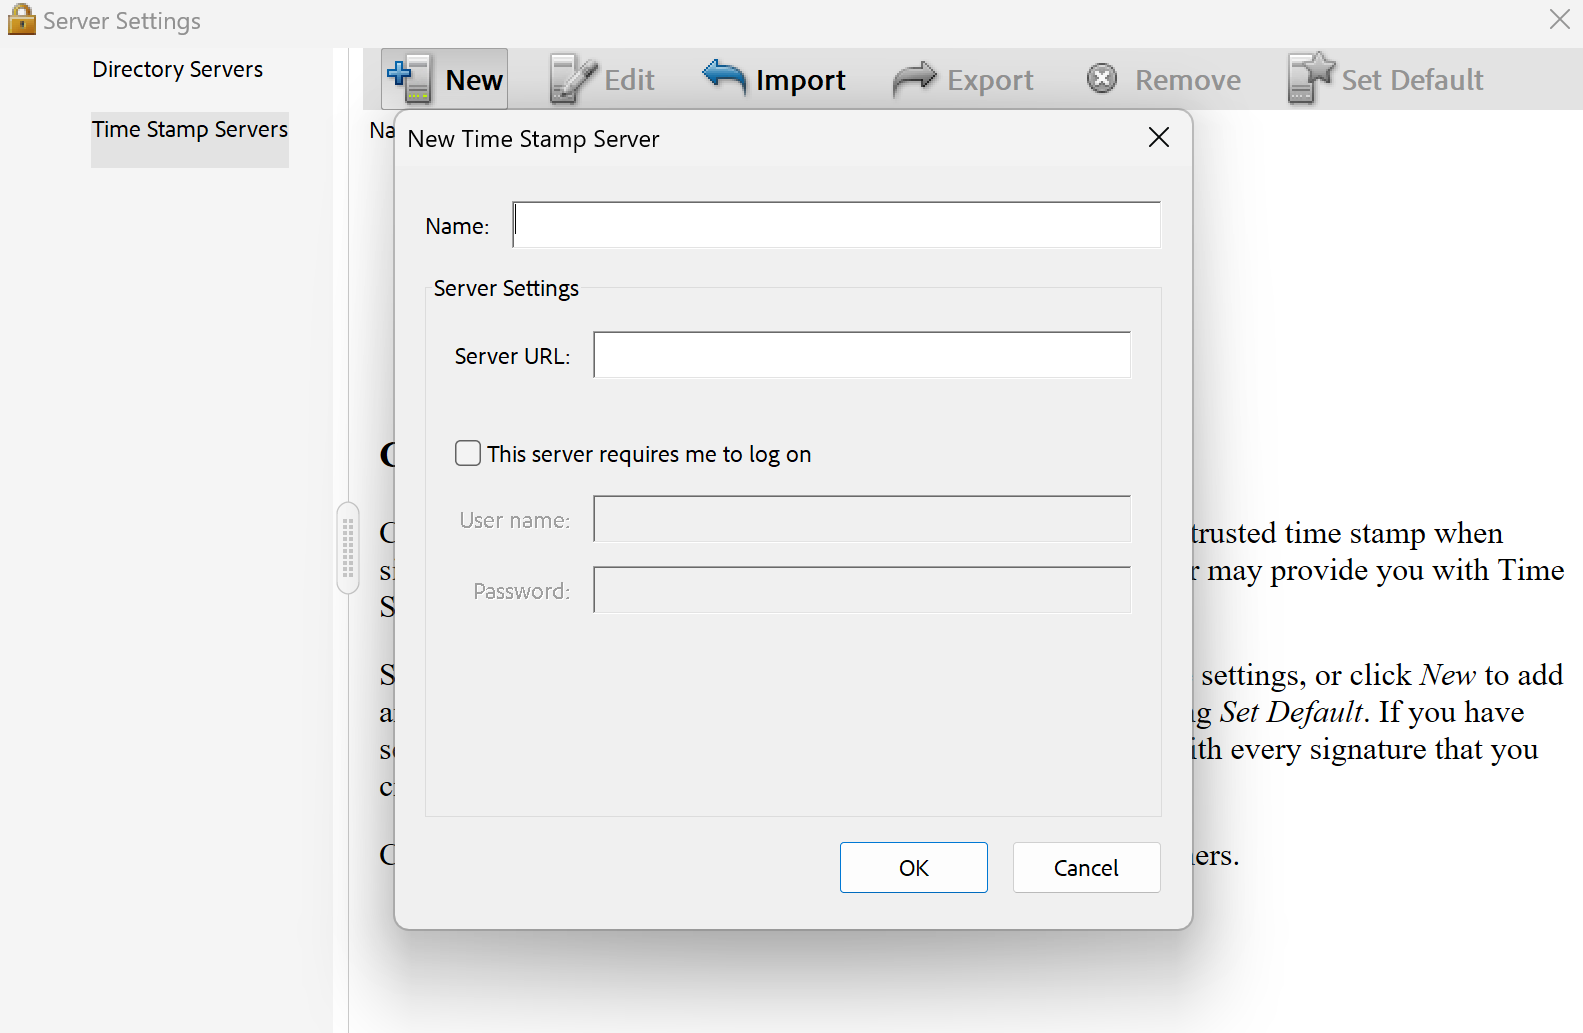
4. Add Timestamp Server:
- Enter a name for the server, such as "Baltstamp" or "Sectigo."
- Insert the corresponding URL (as provided above).
- Confirm the entries by clicking OK.
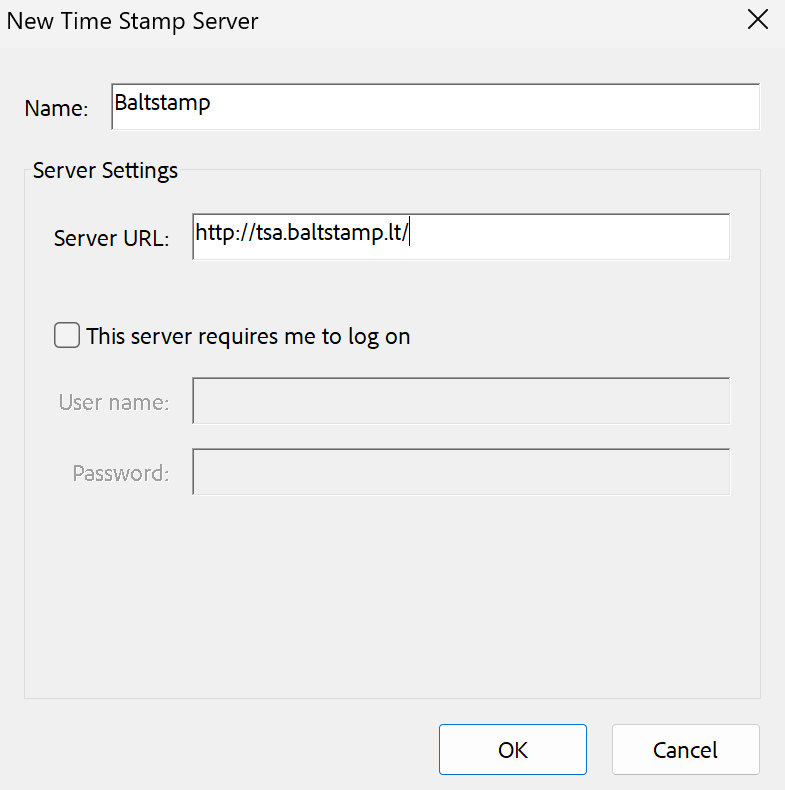
5. Authentication (if required)
- If the service requires authentication, you will need to provide the appropriate login credentials.
3. Configure the timestamp:
4. Add Timestamp Server:
Test the configuration.
Open a PDF document in Adobe Acrobat.
Select the option All Tools > Use a Certificate.
Add a digital signature and enable the timestamp option.
Select the configured timestamp server.
Test the signature and verify if the timestamp has been successfully added.
Open a PDF document in Adobe Acrobat.
Select the option All Tools > Use a Certificate.
Add a digital signature and enable the timestamp option.
Select the configured timestamp server.
Test the signature and verify if the timestamp has been successfully added.
Troubleshooting
If issues arise:
Check the internet connection: Ensure that your computer is connected to the internet.
Check login credentials: Confirm that the username and password are correct, if required.
Test the server URL: Use a separate tool such as OpenSSL or Postman to ensure the server is reachable.
By following these steps, you can set up and use timestamp servers like Baltstamp and Sectigo in Adobe Acrobat. This enhances the trustworthiness and traceability of your digital signatures.
Do you need further support?
Related Articles
Long-Term Validation (LTV) for Digital Signatures in Adobe Acrobat
Introduction Long-Term Validation (LTV) ensures that digital signatures remain verifiable over time by embedding status information (e.g., OCSP or CRL data) into the signed document. This guide explains how to properly configure the LTV function in ...How to the USB-Token in Adobe
Prerequisites Certificate: Your USB token must be properly configured, and the certificate must be successfully stored on the token. SafeNet Authentication Client: Ensure that the SafeNet Authentication Client software is installed on your computer. ...Set up and use the SafeNet Authentication Client
The SafeNet Authentication Client is software designed for the management and use of USB tokens. The client enables digital signatures for documents, secure authentication for websites, VPNs, or corporate networks, protection of certificates and keys ...Set up USB-token
Technical Component of the USB Token PRODUCT NAME SECURITY CERTIFICATION ID VALIDITY PERIOD OF THE CERTIFICATION TYPE OF COMPONENT PURPOSE IDPrime 940 (contact) and IDPrime 3940 (dual interface) smart card with security controller M7892 ...Enable logging in the SafeNet Authentication Client
This guide describes how users can enable logging in the SafeNet Authentication Client. The goal is to save log files and, if necessary, forward them to support for troubleshooting purposes. Logging means that the client generates log files ...